In the last part of this post we stripped down the trike and checked all the components.
This time the wheels are back from Paul at The Ride stuff after a full rebuild and we start putting things back together adding a few nice new shiny bits on the way!
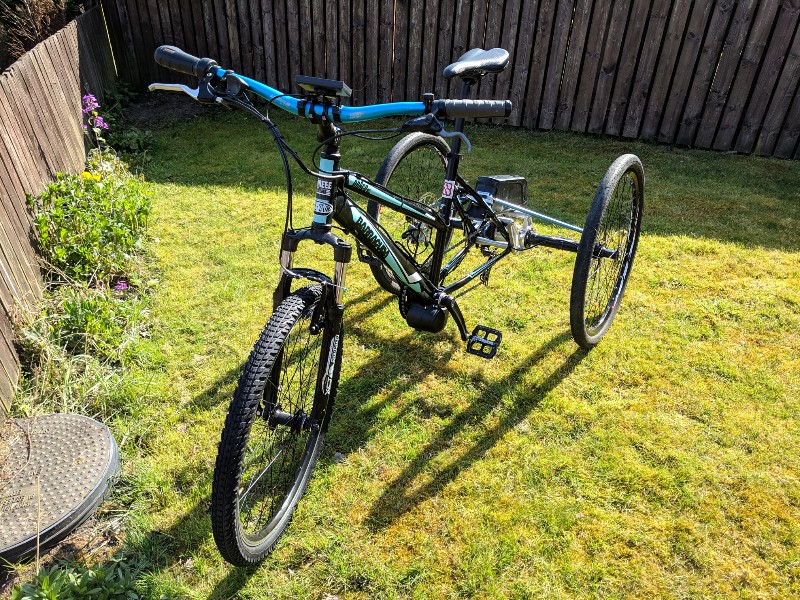
So here are the new wheels, I have to say we had a bit of fun getting them back on as the alignment is critical with disk brakes, but with a bit of gentle helping along it came together. The old brake rotors were shot so two new Avid 203mm rotors were used. Yes they are that big, but they work well!

So up front needed a bit of modernising and some colour! so new bars, grip and stem were added along with a new 26″ mountain bike when (this will have a matching road tyre but for now its just a simple knobbly)


You can also see from this photo that I have added the new TSDZ2 Mid drive motor. Well let me tell you that was not as easy as it should have been!
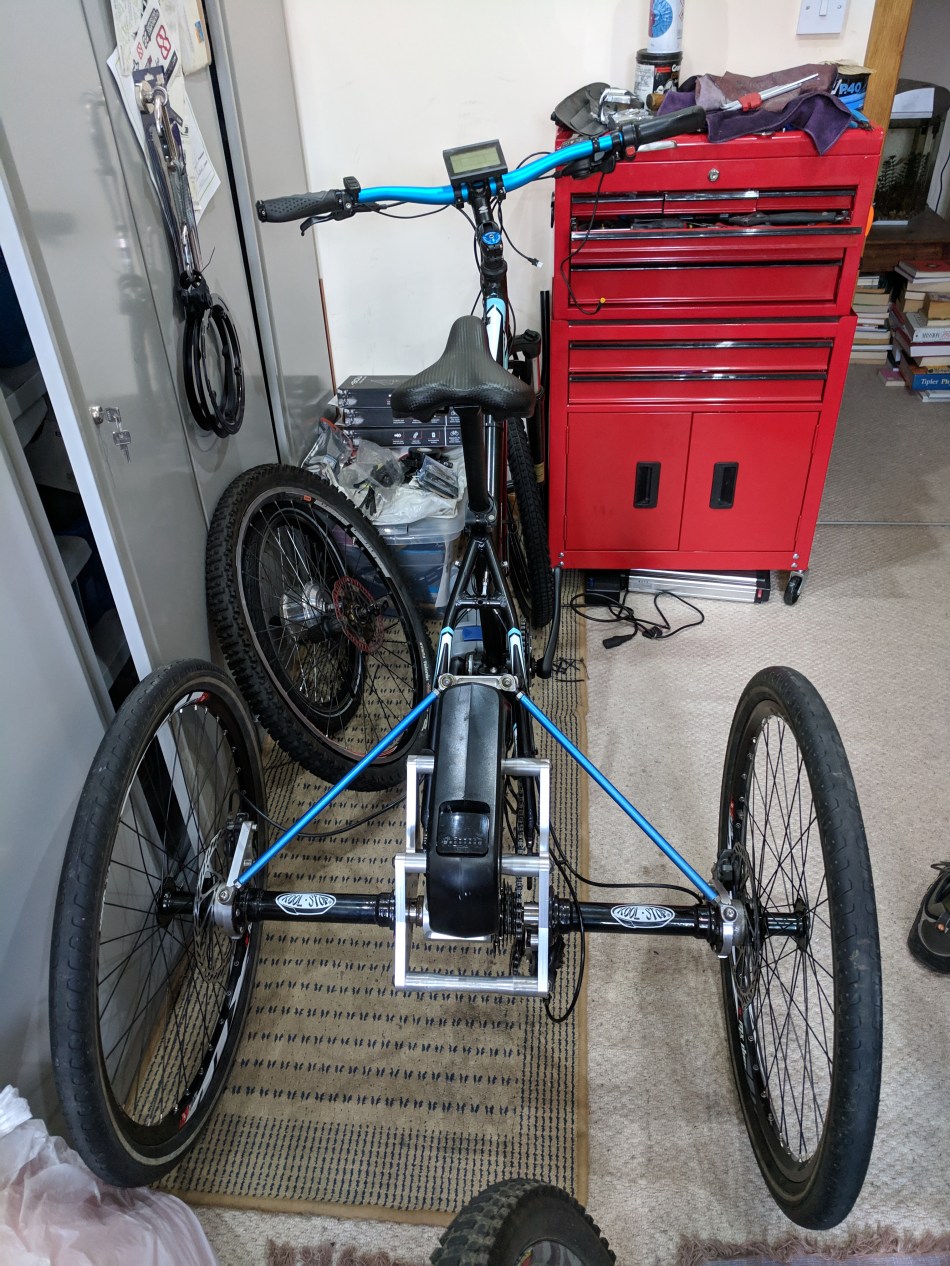
The TSDZ2 mid motor kit is designed to slide into a standard frame where the bottom bracket would usually be fitted. On Bob’s frame the old bottom bracket actually came off quiet easy, but it was the old style separate baring type not a fully contained unit. At first I didn’t think this would be an issue but I soon learned why that style bottom bracket was fitted.
Inside the frame at the bottom bracket the downtube, seat tube and both rear chain stays all met and are welded together. but this bulges into the bottom bracket so it was not a clear cylinder all the way through. In fact it bulged in the middle by about 5mm which meant I could only slide the motor in about 1/2 way before it jammed!
Thankfully alloy frames are easy to file, so after about an hour of ‘gentle persuasion’ with multiple files, it could be slid in and tightened up.
As Simon was away for a couple of weeks we closed up the store and I moved the trike back home for the next stage.


The duct tape was just there to help me get everything home up a steep hill, unfortunately I had to push the trike!
Once Home I started to look at a new battery position

It looks like the battery mount should line up quite well, I just need to design and make some suitable brackets.

In the meantime, I decided to repaint and clean up the sway bars and sort out the cabling.
One interesting problem was how to mount the wheel speed sensor. This would usually attach to the rear chain stay on a normal bike frame, and the cable is only long enough to reach the back of the frame. In the past we have mounted to the disc brake mount for one rear wheel on a trike conversion kit like this. But there was not enough cable to do that this time.
So instead I decided to try an axel speed pickup mount , so quickly designed and 3D printed a disc mount for a small magnet and managed to find a perfect location for the speed sensor.
All that was left was some cable management and flashing the firmware for the screen and motor and Bob’s all done…

 For those eager eyed readers yes the front tyre will be changed to match the rears!

Wow, a big thank you to Neil for all the work you have put in to make ‘Bob’ look so good. I love the blue and he is so sparkling – I can’t wait for next week to come and see him, and test out my new boy.
LikeLike